Okay! I've always been very facinated with the sky, stars, how everything works, how beautiful it is etc... It's just something I've always took interest in but never really got right INTO it.
Last night, my mum asked me what I was doing today, and I was like uhhh not much, going food shopping and making my boyfriend his lunch! (I know, arent I the best! lol jks!) She was like, oh well theres an astrology class on and I'm going to it, just wondering if you would like to go? And I was really interested in going but I was like uhh will I have time..?? But then I thought, no I should go, this is something I always took interest in and now I have an opportunity to learn about it! So this morning I finally made up my decision and I was like... YEP! I wanna go!! lol! So i went along with my mum to this place and WOOOWWWW it was amazing!!!
I am SO glad I went to this and my mum told me about it. It started from 9:00 in the morning until 3:00 in the afternoon! But time flew so fast! Everything was so interesting and I kinda wanted to stay longer and learn more! The astrology class is only once a month so now I cant wait until next months class! >_<
So today, we learnt the basic's of astrology like where it came from how it started sort of thing.. and then the teacher (Narelle) printed off our own personal chart! To make this chart, you have to give them your name, date of birth, what EXACT time you were born, where you were born and the special program makes your personal zodiac chart! Its so interesting! The chart shows what your identity is, how you relate to people etc... you can find out so much about yourself!
There is also many different types of astrology:
Theres Natal Astrology (your personality/identity)
Katarchic (event/electional astrology)
Mundane (ability to look at whats happening in the universe/global events)
Horary (oricle tool/prediction)
Medcial Astrology (health/weakness).....
So this whole thing is just so interesting and I think its really important to know all this! :) Like getting to know whats happening in the world...
If you get the chance to learn astrology and I say GO FOR IT! You will learn so much! Learn new things! ^_^ This was my first day and I can't WAIT until I go to the next class and learn more!! I think she said shes going to teach us all of the star signs so that should be really interesting!

Saturday, February 27, 2010
MAC Studio Fix Fluid Powder Foundation
I've worn this over my liquid foundation and my makeup stays on perfectly all day! I still really like the Maybelline Mineral Powder Foundation, (the one I've been using) but since I have oily skin, I have to touch up through out the day because my face gets so oily and the foundation starts getting patchy!
BUT! With the MAC powder foundation, it doesnt get patchy and my makeup stays on perfectly and stays the same all day. I still have to use the oil blotting paper throughout the day but it doesnt look bad as when I use the Maybelline one.
I still really like the Maybelline one but its only good when you have it with you so you can touch up your face. Then it looks really good! ^_^
SO... overall... IF you have the time and you take the Maybelline powder foundation with you...its better because its cheaper and it give you a nice coverage. ORRR if you DONT have time to touch up throughout the day then I think the MAC one is better.
This is judging with oily skin type so it may be different depending on YOUR skin type! :)
If you have dry skin, then this will probably wont be a problem with you because your so lucky and you dont get gross, oily skin throughout the day!!! Haha.
Thursday, February 25, 2010
New stuff!

I just went shopping for a bit and I bought:
MAC Studio Fix Fluid Powder Foundation NC25
Sally Hansen Lip Inflation
Black Top
The Sally Hansen Lip Inflation was a special and I got 2 of the lip glosses for the price of 1! YAYY! Haha. So I got the mocha (brown) and clear coloured ones! ^_^
I really like this lip gloss. Its supposed to plump the lips. It has ginger, cinnamon and peppermint which cools and stimulates the lips, making them appear bigger. I guess it works a bit but its not a BIG difference.
The foundation powder was the one I wanted for awhile so I finally got it! It's a small, round compact with a sponge on the bottom. It also has a little mirror on the inside which is convenient.
Since I bought it today and I already have makeup on, I haven't tried it out yet properly. So when I use it tomorrow, I'll let you know how it feels and looks.
Tuesday, February 23, 2010
Piercing Ear?
I THOUGHT we were going to practice on each other today but it was actually theory and we only got to practice with the gun on cardboard! Its actually next Tuesday that we get to practice on each other! :)
I can't wait until I get my 2nd ear pierced!
Today the teacher was talking about the Advanced Diploma of Health Science course. This course include:
Advanced Facial Treatments
Chemical Peels
Examine Surgical and Non-Surgical Procedures
Use of Electrical Equipment in Aesthetic Treatments: Laser Hair Removal, I.P.L
Knowledge of Anatomy and Histology
Heaps More....!!
So it sounds really interesting and I would like to gain more experience and knowledge! Especially on all these new type of treatments you can get because it is becoming a lot more popular in the beauty industry.
I'm also really interesting in doing...
-professional makeup course: bridal, basic, photographic, tv, movies etc.
-eyelash extensions
-cosmetic tattooing
-hair styling
-injectables
So there is A LOT I want to learn and it's gonna cost so much! T_T Maybe over time I can complete some of these courses..
Sunday, February 21, 2010
Good Afternoon!
I just got back from work and I had fun!! :D I was much better at the cash register although I had a few problems, it wasn't as hard as the first time. I'm a little more confident so yayyyy! :D
It was actually pretty quiet and the day went really fast! I bought some mayo chicken sushi on my lunch break and mmmmm it was so good!!! I want one now! I'm so hungry but I don't know what to make. T_T I looked in the fridge but there's nothing I can make food out of!
Tomorrow at beauty school, we are doing manicures and pedicures. On the Tuesday, we are doing EAR PIERCING! WOOOOOOO! It's gonna be scary because we have to practice on each other!! So hopefully, everything will be okay and I wont come back home with a bleeding ear, IF i come back WITH an ear! Haha. :) Yes. I am funny. :|
Anyways.... :S
Looking forward to that!
^_^
"If you make time to list all the things you are grateful for, and you feel the feelings of gratitude, you will feel amazing every day. Your frequency will be high and you will move through your days in love with being alive, bringing joy wherever you go, positively affecting one person after another. When you live a life like this, everything you want will come before you even ask."
- Rhonda Byrne
- Rhonda Byrne
Good Morning!
I have work soon!!!! I'm looking forward to it actually, its fun working there but I still feel a little awkward on the register T_T! It's a bit confusing but hopefully today I can understand it more and get used to it!
Its raining...!!! I don't like it!!! The ONLY time I like when it's raining is when I'm with Sam and we're inside. Or else it's so boring and there's nothing to do.
Yesterday, I went shopping for a bit and I bought:
-MAC Select Sheer/Loose Powder NC20
-MAC Studio Fix Fluid Liquid Foundation NC25
-Foundation Powder Brush
-Clearasil Extra Strength Pimple Cream
-Maybelline Colossal Volum' Express Mascara
I needed a new foundation powder and I though the MAC Select Loose Powder would be good so I went and bought it. However, since I like a loose powder to put on AFTER a liquid foundation for more coverage and also to set the liquid, the MAC Select was more a translucent powder (really really light sheer/silky powder which sets foundation) and it wasn't the 'coverage' I was looking for. But I use it as a translucent powder and its great.
The powder I've been using is the Maybelline Mineral Power. I actually really like this one. I normally just go over my foundation with this powder and it covers all my scars/redness, it gives me a good coverage and sets my foundation. :) I use the Light 2 Classic Ivory.
So that's what kind of powder I wanted and I thought MAC should have a good one but I guess I got the wrong type of foundation powder. T_T Oh well, at least I can still use it. I should've got the MAC Studio Fix Fluid Powder Foundation instead. The liquid foundation I'm using right now is the MAC studio Fix Fluid Liquid Foundation so I think that one would be a better powder.. >_<
Haaaaa....
At least I have a job now, I can buy things! YAY!!!!!!!!
Thursday, February 18, 2010
Bobbi Brown Hydrating Face Cream

Yesterday for beauty school, we had to go into David Jones and look at some beauty products!
Our group had to look at the brands Bobbi Brown and Giorgio Armani.
We first went to Giorgio Armani and we looked at the moisturizer. The moisturizer there is made from volcanic stone. It costs.... $480 just for the moisturizer! We got to try it out on our hands and it was really smooth and hydrating. They said it doesn't clog pores, for all ages and long lasting. It was really nice but its too expensive for me lol! The lady there knew A LOT about the product and even told us a bit about the history of Giorgio Armani. Apparently he went to some island and notice that all the people looked very young. So he was interested and found out about the volcanic stone. Then he made the moisturizers. But about the lady working there, even though she knew alot about the product, when we asked her how much it was she didn't tell us straight away because she "assumed" we didnt have enough money and told us to go somewhere else where there are affordable moisturizers! We were like :O! That was really rude because even if we didnt have that sort of money, we were interested in the product and you can't "assume" that a person doesn't have enough money because how they dress, how young, how old they look etc. You can't tell! She just assumed and thought that was really rude. Someone who wears a t-shirt and thongs can be a millionaire.. you never know.

After that, we went to Bobbi Brown and had a look at their moisturizers. We found the Bobbi Brown Hydrating Face Cream! It smells so nice and it was smooth, hydrating, long lasting and creamy! I really liked this one! Plus, it's $75 so its affordable. You only need 2 little dots of it to cover your whole face so its very long lasting and it can also be a makeup primer! So not only it moisturizes, it primes your face for easy application and sets your makeup for the whole day! The lady there was really nice. She was outgoing and not rude like the other lady. She was very helpful.
So out of the two moisturizers, I would definitely go to Bobbi Brown and buy that face cream!! I really want it. She gave us a sample and I tried it on my face last night. It was soo smooth and I could still feel the moisture on my face after half an hour! The moisturizer I use right now dries up really quickly. T_T
PLUS the service was better! :D
Start Priceline today!!!
YAYYY!!! I got a new job at Priceline!
I'm starting my first shift today from 2:00pm~7:00pm! It's going to be an induction and training. ^_^
Should be fun! I get to work around makeup and all these products instead of FOOD! FOR ONCE! :D
I'm starting my first shift today from 2:00pm~7:00pm! It's going to be an induction and training. ^_^
Should be fun! I get to work around makeup and all these products instead of FOOD! FOR ONCE! :D
Wednesday, February 17, 2010
APPLE CIDER VINEGAR!
My new favourite product!

Okay, first you might think apple cider vinegar? BUT! ACV is amazing! You can use this stuff for anything!
First of all, I started researching about it because I heard it was good for treating acne. My skin used to be really bad especially during junior and high school. I always had pimples, redness and it was really embarrassing. I still have a little redness and scarring from it but it's getting alot better! Acne can be caused by hormones, dirt, bacteria, clogged pores and STRESS!
I think my skin was mainly caused by hormones and stress. Because, I always took care of my skin and washed my face in the morning and night (with a hot face towel to open up the pores). I stressed so much about my face and I ALWAYS wore makeup whenever I went out because I was so embarrassed of how my skin looked. The even more I stressed about how I looked, it got even worse and I just felt so ugly and emotional. I saw proactiv and I was convinced to buy it from watching the ads on tv SO I bought it! I was so happy when it arrived in the mail and I thought YES, this is going to clear up my skin!
The next thing, I noticed lines around my mouth! I remember looking into the mirror and thinking, did I have that line there? So I looked closer and it was fine lines around my mouth and it looked like wrinkles! I thought, this can't be happening! I am getting wrinkles on my face!!! First I didn't know how it happened but then I realized my skin was so dry that my skin shribbled and when I smiled, I had all these lines of my face! It was horrible. I started freaking out! MY face got so dry I couldn't even open my mouth and I couldn't even talk! It was that bad. I got off the proactic and the dryness slowly disappeared.
But I'm not saying that proavtic doesn't work. I'm just letting you know what happened to me and it didn't work on my skin. I'm sure it works on different people.
ANYWAYS, thats a whole another story but yeah Ive tried so many products because I was so desperate to clear up my skin and anything I saw that said it will clear the skin, I tried it. Well now that I'm 19, my skin is alot better and I take care of my skin more. But I still find skin care products interest me especially products that help the scarring and restore the skin. But having said about the skin care products and caring my the skin on the outside of the body, caring for the inside of your body is even more important.
APPLE CIDER VINEGAR
Apple cider vinegar can help acne, skin complexion, metabolism, detoxify, headaches, indigestion sore throats, eczema and much much more.
It has similar properties of glycolic acid which is often used for treating acne.
Make sure that you buy an organic ACV and not one that is distilled, filtered or pasteurized as the extra processing steps can destroy the vitamins and nutrients in the apple cider vinegar. I leave my ACV in the fridge and whenever I go put some on a cotton pad and wipe it on my face, its cold and feels refreshing!
The minerals in the apple cider vinegar include:
calcium, potassium, magnesium, phosphorus, chlorine, sodium, sulfur, copper, iron, silicone, flourine, Vitamin C, A, E, B1, B2, B6, beta carotene and Vitamin P. So that's a lot of minerals all in one!
I used this as a toner for my face. First I use a hot towel to open up the pores and then I cleanse my face. After I've cleansed my face, I put some apple cider vinegar on a cotton pad and wipe over the face. Then I apply moisturizer.
Advantages - tightens pores, feels fresh, cheap, takes off dirt and bacteria.
Another thing you can do is, if you dont like using the cotton pad to wipe it over your face, you can put the ACV into a spray bottle and spritz it over you face.
Disadvantages - strong vinegar smell, can sting a bit
If you have sensitive skin, its recommended that you mix the ACV with water. (50/50) You may also want to TEST it onto your skin first just incase you dont get a reaction to this. The vinegar is very strong and ir may burn. Dab a bit onto you chin and leave it for 15 minutes. After that, you can see you have any reactions to it. The last thing you want is wiping the ACV all over your face then getting a reaction to it!
ACV can also be taken internally. You can take 2 tablespoons of ACV and mix it into a glass of water.
I personally really like it as a toner. Even if it smells a bit, it feels fresh on my face and my skin feels clean. I think its helping my skin look much better! Right now I dont have any pimples! But I guess I'll keep trying and see the results.
Everyone is different so don't think this will work perfectly on you because like I said about the proactiv, it works on different people, skin type.. etc
^_^!! But I LOVVVEE IT! :D
Monday, February 8, 2010
Client day 1: Lash Perm, Lash Tint and Pedicure.
Tomorrow is our first client day which is when you bring one of your friends/family in to the beauty school and you give them treatments, pretending you're working at an actual beauty salon.
I'm giving my mums friend the treatment tomorrow so I'm kind of nervous BUT kind of excited as well. >_<
I think it'll be a lot of fun but I just hope everything turns out well!!
I'm giving my mums friend the treatment tomorrow so I'm kind of nervous BUT kind of excited as well. >_<
I think it'll be a lot of fun but I just hope everything turns out well!!
Sunday, February 7, 2010
How to Volumize Hair with a Straightener
I pretty much do this everyday.
I dont like having really curly hair and I dont like having really straight hair. So I like to volumize my hair and have a little bit of a curl, especially at the end of my hair.
So, I use a hair straightner to give it more volume and shape. Its really easy and fast!

This is how my hair is naturally.
First, get your hair straightner and grab some hair.
Now create a C shape focusing more on the middle to the end of your hair.

You pretty much do that through your whole hair! That's it! :)
Back of my hair. You can see that it is curly but not too curly. I COULD say its wavy but you can make your hair even wavier with different techniques SOOOO, I personally wouldn't call it wavy :)
ITS JUST... VOLUME! lol I dont know... this is getting confusing so I'm gonna stop. Hope you liked it!
I dont like having really curly hair and I dont like having really straight hair. So I like to volumize my hair and have a little bit of a curl, especially at the end of my hair.
So, I use a hair straightner to give it more volume and shape. Its really easy and fast!

This is how my hair is naturally.

First, get your hair straightner and grab some hair.

Now create a C shape focusing more on the middle to the end of your hair.

You pretty much do that through your whole hair! That's it! :)

Back of my hair. You can see that it is curly but not too curly. I COULD say its wavy but you can make your hair even wavier with different techniques SOOOO, I personally wouldn't call it wavy :)
ITS JUST... VOLUME! lol I dont know... this is getting confusing so I'm gonna stop. Hope you liked it!
My hair after treatment!
OKAYYYY!!!!!!!!
I washed my hair and dried it (with a blow dryer) this morning and....
my hair was REALLLLY smooth, soft, shiny and in much better condition than it was before!! ^_^
It doesn't feel oily at all!
After I washed my hair..
After I dried it. As you can see, my hair is a lot smoother and it wasn't frizzy at all!
So I would probably rate this treatment about 8 out of 10. Only because you have to wash it AGAIN to take all of the oil out and it can be annoying. But other than that, it worked quite well!!! :D
I washed my hair and dried it (with a blow dryer) this morning and....
my hair was REALLLLY smooth, soft, shiny and in much better condition than it was before!! ^_^
It doesn't feel oily at all!

After I washed my hair..

After I dried it. As you can see, my hair is a lot smoother and it wasn't frizzy at all!
So I would probably rate this treatment about 8 out of 10. Only because you have to wash it AGAIN to take all of the oil out and it can be annoying. But other than that, it worked quite well!!! :D
Saturday, February 6, 2010
Dry hair treatment with Coconut Oil!
Okay, I heard that Coconut Oil is one of the best hair treatments for dry, brittle hair and it provides the special proteins that nourish damage hair.
(http://www.organicfacts.net/organic-oils/organic-coconut-oil/health-benefits-of-coconut-oil.html)
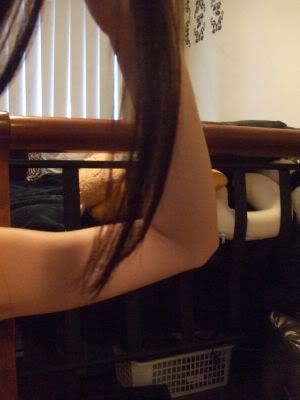
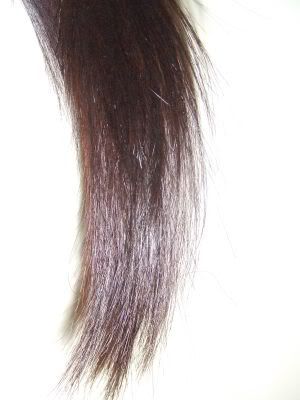
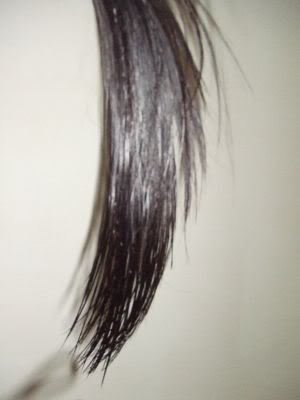
My hair was really dry so I thought I'd give it a try..
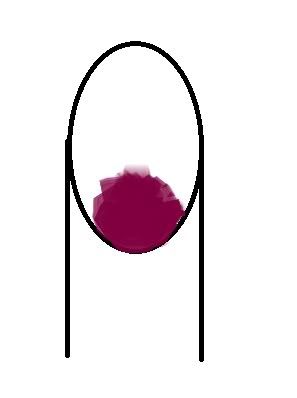
1.
Before the coconut oil treatment. As you can see, the ends of my hair was really dry. It felt like hay! lol.
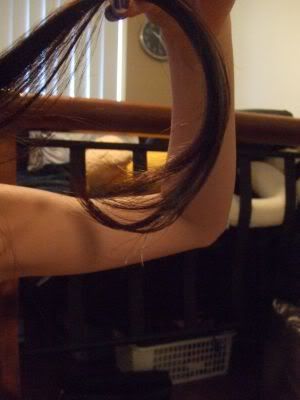
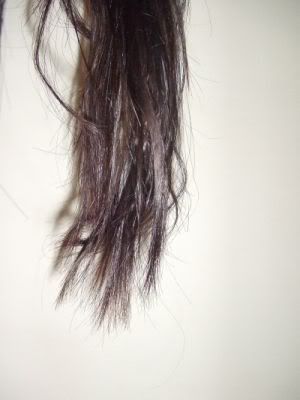
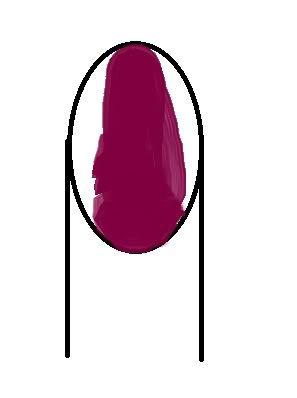
2.
Okay, this is AFTER I put in some coconut oil in my hair. I wrapped my hair with a towel and waited 30 minutes.
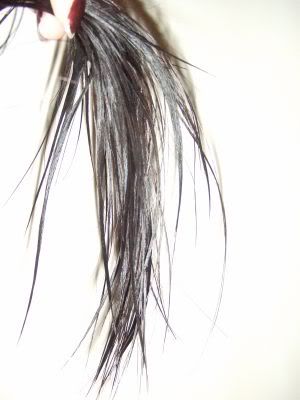
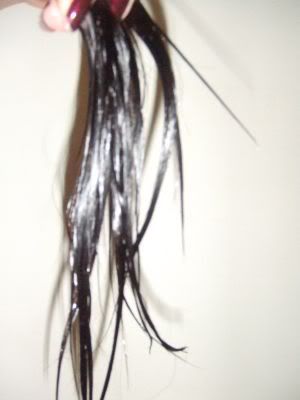
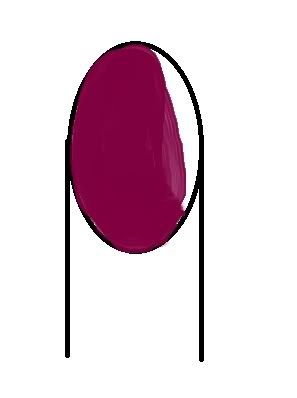
3.
After I washed my hair with shampoo and conditioner to get rid of the oiliness.
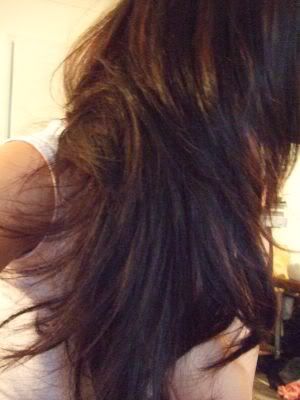
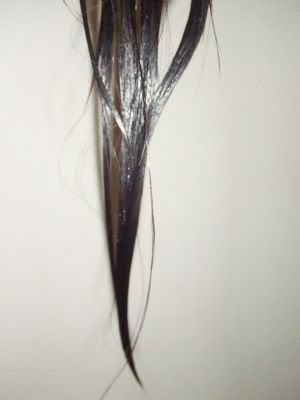
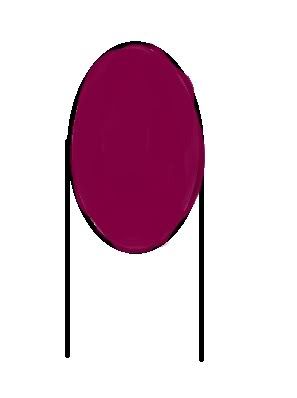
4.
After the treatment! (dried)
OVERALL:
Well, it worked! My hair was much smoother, shinier and softer! My hair feels healthy! The only bad this is, after I washed it out and dried it, it still felt a little oily. So if you're planning to do this, I recommend doing this when your just going to bed or when you don't have plans to go out. UNLESS, you dont mind the oiliness. :|
I'm not going out tonight so I'm just going to leave it and wash my hair tomorrow morning to get the rest of the oil out. :)
So I'll let you guys know how it feels in the morning after I wash my hair again! ^_^
(http://www.organicfacts.net/organic-oils/organic-coconut-oil/health-benefits-of-coconut-oil.html)
My hair was really dry so I thought I'd give it a try..
1.

Before the coconut oil treatment. As you can see, the ends of my hair was really dry. It felt like hay! lol.
2.

Okay, this is AFTER I put in some coconut oil in my hair. I wrapped my hair with a towel and waited 30 minutes.
3.

After I washed my hair with shampoo and conditioner to get rid of the oiliness.
4.

After the treatment! (dried)
OVERALL:
Well, it worked! My hair was much smoother, shinier and softer! My hair feels healthy! The only bad this is, after I washed it out and dried it, it still felt a little oily. So if you're planning to do this, I recommend doing this when your just going to bed or when you don't have plans to go out. UNLESS, you dont mind the oiliness. :|
I'm not going out tonight so I'm just going to leave it and wash my hair tomorrow morning to get the rest of the oil out. :)
So I'll let you guys know how it feels in the morning after I wash my hair again! ^_^
The House of Dead: Overkill

Who loves shooting games!?????
I LOVEEEE IT! If you do, you should play The House of Dead: Overkill game! You shoot zombies and it is so much fun! :) Especially when you use a hand cannon WHILE you're playing... :O
Pikachu and Teddy Bear!

Isn't this he cutest thing!? Poco and Coco sleeping together!!! (This doesn't happen often, it was only because Poco spewed on his sleeping blanket and I had to take it away..)

I gave Poco a new blanket to sleep on!

She ALWAYS sleeps like this! It's so cute!
Banana Split

Yesterday afternoon, I felt like eating a banana split from Cold Rock so... I got one!! I had 3 flavours to choose from so I got vanilla, double chocolate and coffee TOPPED with banana, whipped cream, chocolate sauce, nuts and a malteser! YUUUuUUMMMM! I ate it all by myself..
Thursday, February 4, 2010
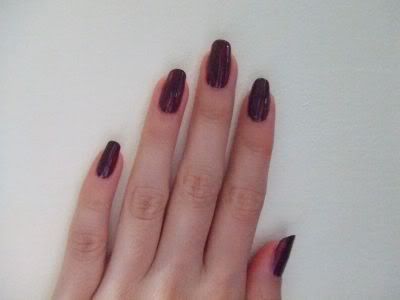
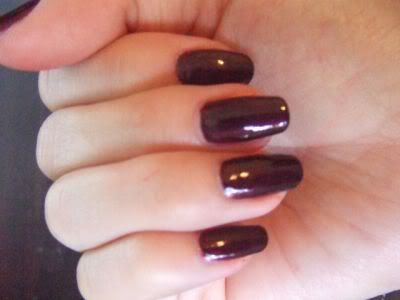
How to get perfect nails..
We all put nail polish on ourselves and how many times has it bled from the side, has big clumps or it has that streaky look to it?!
Well here are some simple steps to getting the perfect nails!
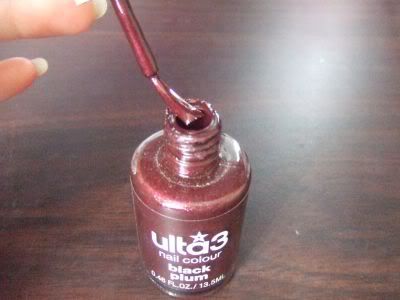
1. You want to get a good amount of nail polish on the wand. What you do is drain the nail polish from ONE side of the wand from the top of the bottle!
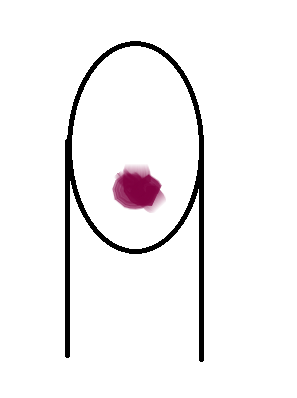
2. Turn the wand to the side that has nail polish and make a BLOB/DOT in the middle of the nail.
3. After that, quickly wiggle the wand to as CLOSE as you can to the cuticle, starting from the blob you made.
4. Once you got down to the cuticle, stroke the wand up in one straight line, so that you have a straight line of nail polish.
4. Then create a HALF MOON on one side.
5. Create a HALF MOON on the other side.
YOUR DONE! ^_^
TIP: Make sure you apply base coat first and a top coat to protect your nail polish from chipping off!
Well here are some simple steps to getting the perfect nails!


1. You want to get a good amount of nail polish on the wand. What you do is drain the nail polish from ONE side of the wand from the top of the bottle!

2. Turn the wand to the side that has nail polish and make a BLOB/DOT in the middle of the nail.

3. After that, quickly wiggle the wand to as CLOSE as you can to the cuticle, starting from the blob you made.

4. Once you got down to the cuticle, stroke the wand up in one straight line, so that you have a straight line of nail polish.

4. Then create a HALF MOON on one side.

5. Create a HALF MOON on the other side.

YOUR DONE! ^_^
TIP: Make sure you apply base coat first and a top coat to protect your nail polish from chipping off!
Day 8: Advise on Beauty Services
Yesterday we had a whole booklet to go through 'Advise on Beauty'.
We learnt about:
1. Improving, maintaining and sharing knowledge
2. Researching and applying product and service knowledge
3. Demonstrate an understanding of competitors products and services
4. Identifying clients needs and matching these to products and services
5. Evaluating products and services according to a client's requirements
6. Demonstrating and accurately explaining features and benefits to clients
So the whole thing was pretty much about selling beauty products. So this might come in handy for anyone! Even if you're not working in the "beauty" industry. :)
(I'm going to try my best to just keep it short with the important notes)
1. Improving, maintaining and sharing knowledge
Some clients who come into your workplace may already know what they are looking and what service they want. But most of the people will seek your advice on which product or service will suit their requirements.
Many clients will make the purchasing decisions based on the depth of your knowledge and how you communicate about the product. It also comes back to good customer service, if you're all grumpy and you don't really care for the clients requirements, their not going to buy from you.
Understanding product and service knowledge relates to:
- the basic contents of the product
- the procedures of the product
- the storage and handling requirements
- the effect and uses of the product
- the effect and purpose
- the feautres and benefits
- the advantages and disadvantages of the product
- the price
- the brand (is it good?)
2. Researching and applying product and service knowledge
Within your workplace, you may have a large range of products displayed for clients to choose from. Similar products vary to some degree in brand name, contents, price, appearance etc...
It is very important that you understand the features of the products in your workplace and also know the needs and wants of the client. This is because you may come to a time when you have to think why is this product more suitable for the client than the other one?
3. Demonstrate an understanding of competitors products and services
Competitors are everywhere! You have to understand what your competitors offer to their clients. With this knowledge, you can compare the products and services in your workplace and describe the advantages and benefits of your range to clients.
Clients consider making decisions when purchasing a product from one particular beauty business. This is include of:
- Price range (expensive, inexpensive)
- Service options (is there a wide range of products to choose from?)
- Treatment options (are there different types of treatments available?)
- Brand options (is my favourite product brand avaible?)
- Guarantees (is there a client satisfaction or money back guarantee?)
- Ingredients (do the products use natural ingredients?)
- Likelihood of allergic reactions (is there information about possible reactions?)
- Appearance of the product
4. Identifying clients needs and matching these to products and services
Before you can explain the benefits of the product and encourage them to buy it, you must establish the requirements and preferences of that client. The six main categories include of:
1. Safety (will it irritate client?)
2. Performance (will it work?)
3. Appearance (packaging attractive?)
4. Comfort (does it have a frangrance?)
5. Economy (is it afforable?)
6. Durability (what strengths does it have?)
5. Evaluating products and services according to a client's requirements
This is mainly about the knowledge of the benefits and features of the product.
Features - the physical characteristics (texture, smell, colour, long lasting etc..)
Benefits - benefits build on the feauture of the product (what can this product or service do for me?)
For example:
Features Benefits
smooth texture feels comfortable, easy spread
fragrance smells pleasant
long lasting do not have to re-apply
6. Demonstrating and accurately explaining features and benefits to clients
Giving the clients a visual demonstration is good way of encouraging them to make their final decisions.
Demonstrating the best techniques for apply the product or showing them the colours, texture, how it feels on the skin can be a great way to communicate with your clients. You can simply demonstrate a lipstick colour by applying it on the back of your hand.
Well, I hope this comes in handy! :D
Wednesday, February 3, 2010
I love Jojoba Oil!!!

Introducing Jojoba Oil:
Jojoba (pronounced ho-HO-ba) is a botanical extract of the seed of the jojoba tree (Simmondsia chinenis). What’s interesting about it is that it isn’t actually an oil, but rather what they call a wax ester. Why do we care? Because out of all of the compounds in nature, this wax ester is the most similar to human skin oil (sebum). Jojoba oil is non-comedogenic so we can use it without fear.(http://www.acne.org/jojoba-oil.php)
The best thing about Jojoba oil is that you can use it in MANY different ways!
Moisturizer: You can add a few drops of Jojoba oil into your everyday moisturizer feeling your skin soft and smooth. It can also be applied to your skin by itself. This includes your face and body!
Make-up remover: Jojoba oil can easily remove makeup including foundation, eyeshadow, blush..etc! I actually do this at home. It works quite well! I put some Jojoba oil onto a cotton pad and gently remove it, the makeup pretty much just glides off. It wont irritate the skin and it feels nice because I know the oil is good for the skin other than other makeup removers with harsh chemicals.
Also good for hair conditioner, lip balm, shaving oil, massage oil, restoring the skin, stretch marks, acne scars, cuticle oil....
If you get ingrown hairs, you might want to read this site..
(http://hairremoval.about.com/od/shaving/a/ingrown-home.htm)
Its a recipe to make your own home made sugar scrub!
All you need is cane sugar, jojoba oil and an essential oil! ^_^
Tuesday, February 2, 2010
Rocky Road!!!
Last night I decided to make some Rocky Road!!!
Now if you want to make some yourself. Here is the recipe, along with photos I took while I was making mine! ^_^
Total cooking time: 20-30 minutes
Makes: 2 slices
Ingredients:
150 g unsalted butter
1/3 cup icing sugar, sifted
1 1/4 cups self-raising flour
2 tablespoons cocoa powder
250 g coloured marshmallows
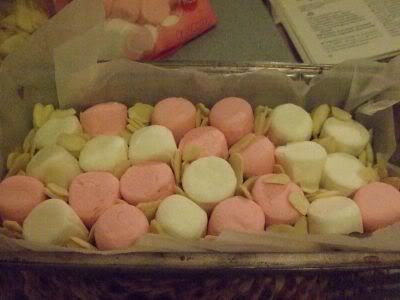
100 g coloured glace cherries, halved (optional)
200 g dark chocolate, chopped
15 g white vegetable shortening
1. Preheat oven to moderately slow 160C
2. Brush two 26 x 8 x 4.5 bar tins with melted butter or oil
3. Line with baking paper
4. Using electric beaters, beat butter and sugar until light and creamy in large bowl
5. Using metal spoon, fold in combined sifted flour and cocoa; mix well.
6. Divide mixture evenly between both tins
7. Press mixture into tin using both fingertips
8. Bake 20-25 minutes or until lightly coloured. Stand in tins to cool
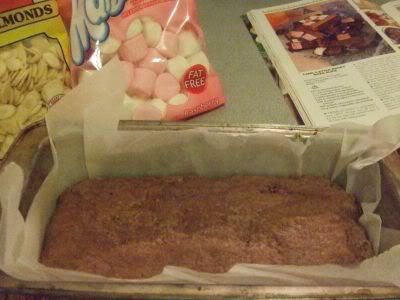
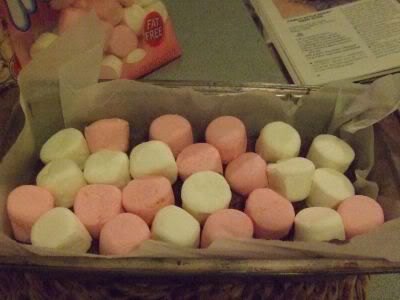
9. Top base with marshmallows and whatever else you want to put in your rocky road!
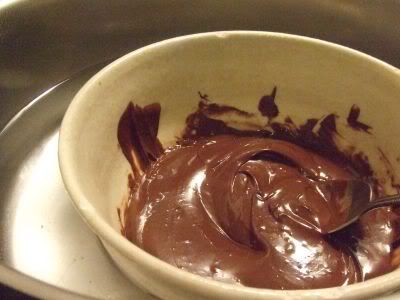
10. Place chocolate and shortening in medium heatproof bowl
11. Stand over pan of simmering water and stir until chocolate and shortening have melted and mixture is smooth
12. Spoon chocolate mixture evenly over both slices.

13. Tap tins gently on bench to distribute chocolate evenly.
14. Finally, cut lice into squares or fingers!!
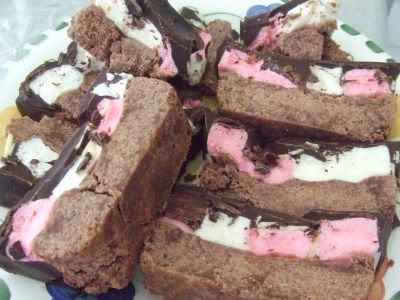
And wa-lahh!!! You have your Rocky Road!!! >_<
Now if you want to make some yourself. Here is the recipe, along with photos I took while I was making mine! ^_^
Total cooking time: 20-30 minutes
Makes: 2 slices
Ingredients:
150 g unsalted butter
1/3 cup icing sugar, sifted
1 1/4 cups self-raising flour
2 tablespoons cocoa powder
250 g coloured marshmallows
100 g coloured glace cherries, halved (optional)
200 g dark chocolate, chopped
15 g white vegetable shortening
1. Preheat oven to moderately slow 160C
2. Brush two 26 x 8 x 4.5 bar tins with melted butter or oil
3. Line with baking paper
4. Using electric beaters, beat butter and sugar until light and creamy in large bowl
5. Using metal spoon, fold in combined sifted flour and cocoa; mix well.
6. Divide mixture evenly between both tins
7. Press mixture into tin using both fingertips
8. Bake 20-25 minutes or until lightly coloured. Stand in tins to cool

9. Top base with marshmallows and whatever else you want to put in your rocky road!


10. Place chocolate and shortening in medium heatproof bowl
11. Stand over pan of simmering water and stir until chocolate and shortening have melted and mixture is smooth

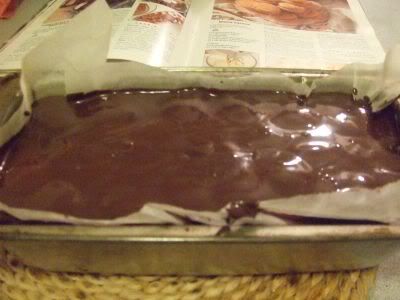
12. Spoon chocolate mixture evenly over both slices.


13. Tap tins gently on bench to distribute chocolate evenly.
14. Finally, cut lice into squares or fingers!!

And wa-lahh!!! You have your Rocky Road!!! >_<
Day 7: Lash Perm and Tint
Today we did our lash perms and tints!
I thought it was fun but it was also very difficult. Since your working around another person eye area especially with chemicals, you have to be really careful!
I found it a bit challenging curling the eyelashes onto curling rod. After I put the glue on the rod, I tried curling the lashes but since the glue was still really sticky, the lashes didnt stick on properly. But once the glue dried a bit and became tacky (just like the eyelash glue when putting on false eyelashes), it was much easier for the lashes to stick on the rod. :)
My classmates did my eyelashes and this is how they turned out! (perm and tint)
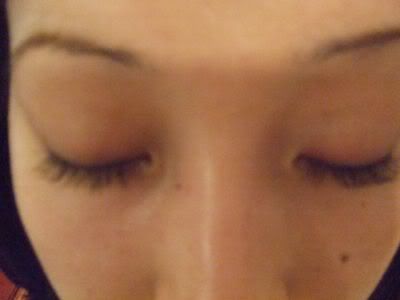
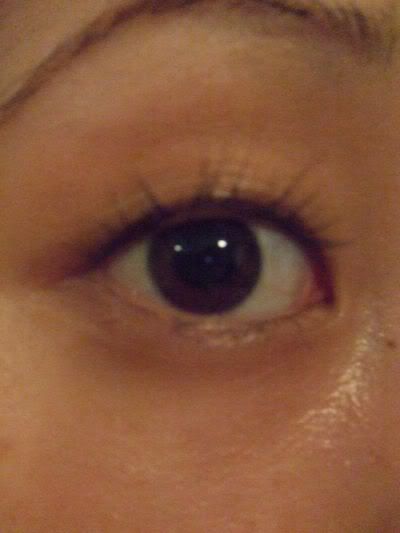
I think they did a good job! :)
The bad thing was... my left eyelid actually reacted to the perming solution and after awhile, it started to sting. My right eye was perfectly fine but somehow, my left eye was stinging and after they washed it off.. my left eye lid was all puffy and swollen!!!
I have no idea why that happened, because I have gotten an eyelash perm before and my eye has never reacted like it did today. The perm solution might have gotten a bit too close to my eyelash root and reacted or my left eyelid was sensitive.
I cooled it down with some ice and just left it alone to heal. It has gone down now.. luckily! ahah :)
Other than that, the eyelashes did perm nicely! I have Asian eyelashes that are normally straight, so now I dont have to worry about curling them everyday!!! You can't really notice the tint because my eyelashes were already black..
^_^
Day 6: Manicure

Yesterday we learnt how to do manicures! It was quite fun!! :)
The last few days have been theory and we finally got to do some 'hands on' stuff!
We all got a manicure and pedicure kit.... here it is!

Cool aye?!
Well we all had to bring our own mani/pedi kits and our towels we received on orientation day!
I'm thinking, instead of writing down the procedures now on this blog, I thought when I practice on someone, I will take some photos. Then I will write down the procedures step by step along with photos on another blog so that you can get a visual idea! :) That way it's more interesting...
So I will upload the manicure procedures as soon as I practice on someone so you can see how to do it yourself!!!!!
Subscribe to:
Posts (Atom)